Table of Contents
Importing parameters to Ecolego
Parameter values can be imported from either Excel or the parameter database. The procedure is the same; the only difference is that when importing from Excel an Excel file must be selected before opening the window.
To import values from Excel, select
File|Import|Import Values from Excel… and select a file from which to import values.
To import values from a parameter database (requires Parameter database toolbox), select
File|Import|Import Values from Database…. Values will be imported from the currently selected database project.
Import window
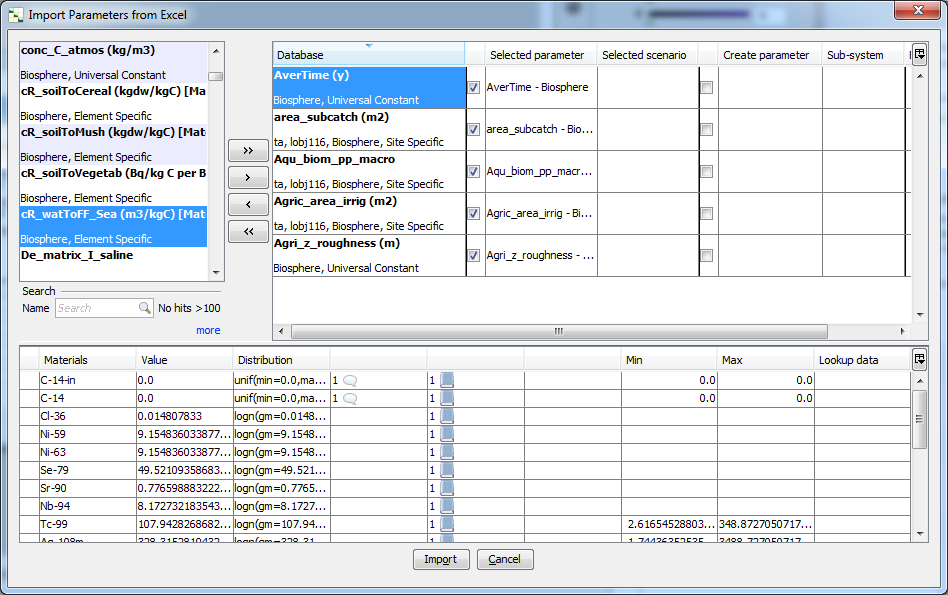
 In the list to the left, all available parameter instances are presented. These can be moved to the model by using the arrow buttons. The table in the center shows all parameters that will be imported, either updating existing parameter values or creating new parameters in the model.
Selecting parameters
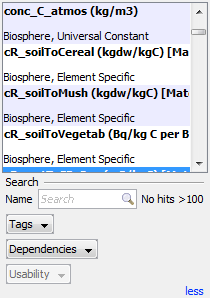
 The list to the left of the window displays all parameters and lookup tables that can be imported. Below the list a field allows you to search for blocks with a specific name. By clicking the more button, more search options are shown.
Use the arrow buttons to move parameters to the table on the right.
Automatic matching
When parameters are selected, the current project will be searched for matching parameters with the following precedence:
Example 1: The model contains a parameter named rho which is located in the sub-system Rurh.Soil. The database lists three parameters named rho with the following tags:
- rho (Rurh, Lake, Conservative)
- rho (Rurh, Soil, Experimental)
- rho (Paris, Soil)
In this case the model parameter will be matched with database parameter no 2, as it contains tags for both sub-system Rurh and Soil.
Example 2: The parameter rho is scenario dependent and has the following scenarios: Conservative, Experimental.The database lists four parameters named rho with the following tags:
- rho (Rurh, Lake, Conservative)
- rho (Rurh, Soil, Conservative)
- rho (Rurh, Lake, Experimental)
- rho (Rurh, Soil, Experimental)
- rho (Rurh, Soil)
In this case the model parameter will be matched with database parameters no 2,4 and 5:
- Rurh.Soil.rho[Conservative] to 2.
- Rurh.Soil.rho[Experimental] to 4.
- Rurh.Soil.rho[default] to 5.
Creating or updating
 For each parameter that has been selected the user is given two options: either update an existing parameter in the model, or create a new parameter.
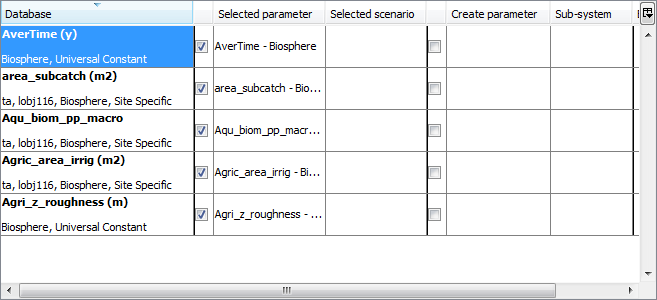
Two thick lines divide the table into three sections:
- The first section shows the parameter as defined in the database/Excel.
- The second section relates to updating an existing parameter. Tic the checkbox next to the column Selected parameter to choose this option.
- The third section relates to creating a new an existing parameter. Tic the checkbox next to the column Create parameter to choose this option.
Updating parameters
A parameter can be updated if it has the same dependencies in the model as in the database/Excel (the name does not matter - only values are imported).
- Select the box next to the column Selected parameter
- Click the in Selected parameter field. A window will appear to select an existing parameter from the model.
- If the parameter is scenario dependent, you can select a specific scenario to overwrite.
Creating new parameters
Before a parameter can be created, the dependencies of the parameter must already exist in the model. Refer to Importing index lists to Ecolego.
- Select the box next to the column Create parameter
- Enter a name for the parameter in the field Create parameter
- Select a sub-system for the parameter by clicking the field Sub-system.
Finalizing the import
Click the Import button in the bottom of the window to import the selected parameters to the model.
Once you have selected a name and location for the Excel file, the Export button will be activated. Click the button to finalize the export and close the window.

