Table of Contents
Time point
Timepoints are objects that hold values and that are used in other objects of the model, for instance in Events and Expression.
Creating a Time point
From the Projects window
- Expand the Project to which you wish to add the compartment by clicking the + symbol next to it. Right-click on ‘Blocks’, or a sub-system in ‘Blocks’, and select Time point from the pop-up menu.
From the Matrix window
- Right click an empty diagonal cell of the matrix and select Time point from the the pop-up menu.
From the Blocks window
- Place the mouse cursor over the table and right-click on it. Select New | Time point from the pop-up menu, or
- In the title bar, select Time point from the Type drop-down list and click on the
 button.

Editing a Timepoint
The block editor is shown by right-clicking the block in a window and selecting Edit. In the Blocks window, you can also show the block editor by selecting the block and clicking the  button, or by double-clicking the right-most “validation” column of the block.
The block editor has three tabs:
Properties
This page lets you edit basic properties such as name, sub-system and base unit. See editing properties for more information.
Appearance
This page lets you edit the visual properties of the block in the matrix window and graph window. See editing appearance for more information.
Values
Here you edit index specific values such as nominal values. See editing values for more information.
Dimension - You can specify the dimension of the parameter by using the Type drop down list. Depending on the dimension the index drop down lists are activated.
Data - The data table contains the following columns:
- Indices - For timepoints that are non-scalar, the first columns will specify indices from the
 Index lists. This allows you to specify different values for different indices. The top row is named “default” and can be used when the same value should be set for all indices.
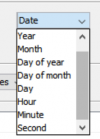
 - Settings - By clicking on settings, option to change the mode appears. Adjacent to this, options for selection of value will change. Default mode for the Timepoint is set in date format.
- Value - By clicking in the value field a dropdown to select the value will appear. In case changes in mode were made, different values for timepoint can be selected as values.

Database
The database tab lets you quickly import values for the edited timepoint from either the local or external database.
| Note | Most block properties can be edited directly in the Blocks window. |
See also
