This is an old revision of the document!
Table of Contents
Exporting parameters to Excel
By exporting parameter and lookup table values to Excel, data can be separated from the model structure. In larger projects this separation is common, as model development usually is the responsibility of a different group of experts compared to the gathering of input data.
The Excel parameter format defines the data structure that must be used for Ecolego to be able to import values from Excel.
The concept of sub-systems is not realized in the Excel parameter format. Instead tags and GUIDs are used to link parameters in the model with parameter data.
Export window
 To export values, select File|Export|Export Values to Excel….
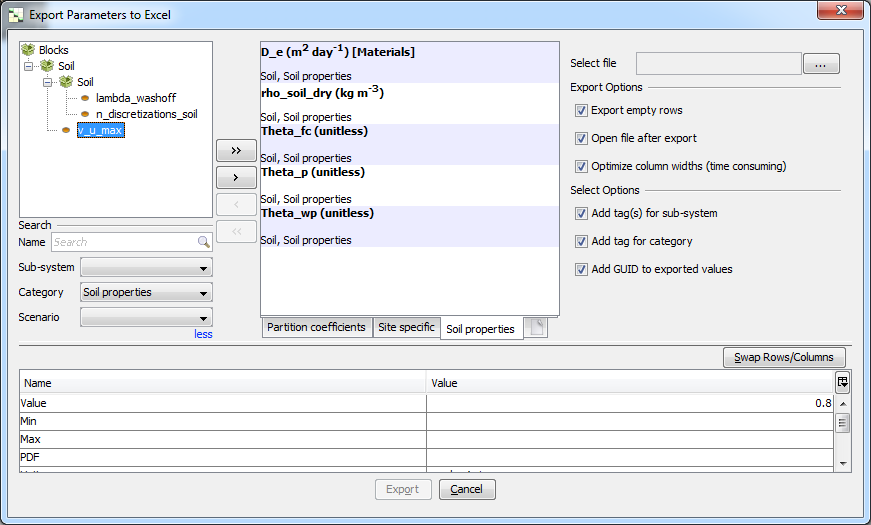
In the center of the window is a representation of an Excel file, with tabs for each Excel sheet. To the left is a listing of all parameters and lookup tables in the model. By using the arrow buttons to the right of the list, model parameters can be selected for each Excel sheet.
To the right of the window are fields that allow you to select the name of the Excel file as well as some control options.
Setting up the Excel workbook
 By clicking the
  button, to the right of the last tab, a new Excel sheet is added. The name of a sheet can be changed by clicking the tab.
Selecting parameters
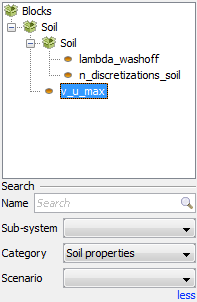
 The list to the left of the window displays all parameters and lookup tables of the current project. Below the list a field allows you to search for blocks with a specific name. By clicking the more button, more search options are shown.
Use the arrow buttons to move parameters to or from the currently visible sheet.
Export options
Click the … button to select a name and location for the Excel file. To save the file with a Office 97 format, use the extension .xls. To save the file with a Office 2003-2010 format, use the extension .xlsx.
- Export empty rows - When selected, rows will be added for indices even when no values are available. Select this option when you wish to export a template for somebody else to fill in.
- Open file after export - When selected, the file will be opened in Excel after the export has completed.
- Optimize column widths - Adjust the size of each column to fit its width to its data. For large files, this option can be very time consuming.
Select options
These options relate to synchronization information stored with each parameter value. More information available here.
- Add tag(s) for sub-systems - Add a tag for each sub-system of the parameter. These tags can later be used when importing data back to the model.
- Add tag for category - Add a tag for the category sub-system of the parameter. This tag can later be used when importing data back to the model.
- Add GUID. The GUID represents a strong link between the value and your model, and will remain even if the parameter is moved or renamed in the model.
Finalizing the export
Once you have selected a name and location for the Excel file, the Export button will be activated. Click the button to finalize the export and close the window.

